Cherish Yesterday...Dream Tomorrow...Live Today

Sunday, December 15, 2013

Something to Celebrate

Hi all and happy Sunday night.  I have had a busy week and it only promises to get busier as Christmas gets even closer.  My oldest son is officially engaged to his girlfriend.  He gave her a ring on her birthday this past week.  They are close to graduating nursing school and will be taking their boards and getting jobs in the field they have prepared for.  I am happy for them.


On the Christmas cookie front, I welcomed a yummy newcomer to my cookie bunch.  These sugared date squares are different from the usual cookies I make this time of year.  A coworker and good friend made me a batch of these for my birthday this year and everyone that had one asked for the recipe.  They are that good!  In a large saucepan, combine 3/4 cup packed brown sugar, 3/4 cup butter, and 8 oz. package chopped dates.  Cook over medium heat, stirring occasionally until almost smooth-about 5 minutes.  Stir in 1 teaspoon vanilla, 3 cups rice krispies and 1 cup chopped walnuts.  Spread in a buttered 9 inch square pan.  Cool and cut into squares.  Dredge each cut square in powdered sugar.  They make a wonderful addition to any cookie tray.

I also wanted to share an easy scarf I made to go with a green coat with an unusual hue of green.  It may not look like it matches in this picture, but one of the greens in the variegated yarn matches exactly.  I used Deborah Norville's serenity chunky yarn in Forest.  I used size 17 needles and cast on 8 stitches using 2 strands of yarn.  I knit the first 6 rows.  For the next row, I knit 1 and then wrapped the yarn around twice and knit another one. I continued like that all the way across the row.  On the next row, I knit 1 and then dropped the extra wraps from the previous row and then knit one.  I continued that on that row and then knit the next 3 rows.  It was an easy pattern and with only 8 stitches in each row, it went quickly.  

I hope you all have a great week ahead.  I have several gatherings with friends to exchange gifts which means several dinners and lunches out this week.  We are also doing our secret Santa swap at school this week.  It will all be hectic but fun.  Take care.  Nancy

Sunday, December 8, 2013

Knitting and Baking

Hi everyone and happy Sunday to you.  I can't believe how time is flying.  Christmas will be here before you know it. 


I wanted to share this fun scarf I knitted and completed in time for my son's girlfriend's birthday.  It was a lot of fun to knit and a little different from my usual-which is a good thing as I easily get caught in the rut of using the same pattern over and over again.  I used a soft yarn with sequins in it and an eyelash yarn.  She loves pink and black so I hope she likes it.  I followed the instructions for the snow bunny scarf from Knit and Crochet Now   tv show.  I watch that show every week and have learned so much from their visual tutorials.  Their patterns are free.  You should check it out.  This season, they are doing a different scarf every week.  I love scarves because they are perfect for my crafting attention span! 

I also wanted to share some delicious cupcakes I made last week. 


They are strawberry filled cupcakes.  I was impressed with the cake's texture.  They were dense without being heavy or dry.  To an ordinary cake mix, add 2 cups of sour cream(thus the wonderful texture) and 2 eggs.  Combine on low speed and beat for 2 minutes.  Fill 24 muffin cups by half  with the batter and make a little well in each one with a butter knife.  Put 1/2 teaspoon preserves of choice in and put the rest of the batter on top.  Bake in a 350 degree oven for about 25 minutes.  Cool for 10 minutes in the pan and then remove to a rack to cool completely.  Frost as desired.  I am going to try lemon cake mix with raspberry preserves next.  I think they will be fantastic!

My jewelry of the week is a set that I personally thought turned out quite well.  I am not sure if it is because red is my favorite color or something else, but I really took a shine to this jewelry.


I wrestled with the idea of keeping it, but instead I sold it.  I thought the silver discs were especially cool.  I am also experimenting with putting chain in my jewelry along with the beaded segments.  It is a lot of fun just putting beads together and deciding what looks right.  I always have the option of making another set just like this to keep.  I may do that!

We had an anniversary party for my in-laws yesterday.  It was an informal open house at my sister-in-law's home.   They will have been married 60 years this Christmas Eve.  They are a wonderful and loving couple and I feel blessed to be a part of their family.  I am cooking a nice dinner for my son's girlfriend this Thursday on her birthday so we are looking forward to that.  I also have my Secret Santa exchange coming up in the school I work at.  I want to make a bracelet as part of my recipient's gift so I better get crackin'!  I hope you all have a great week ahead.  Take care.  Nancy

Sunday, November 24, 2013

More Great Ideas from Fellow Bloggers

Hi and happy Sunday evening.  Is everyone getting ready for turkey day?  I know I am!  My in-laws are coming to my house for the first time in twenty-four years and I am oddly a little nervous!  It will be fun though and I am anxious for all those turkey sandwiches! 

I want to start off sharing a wonderful project that was both fun to create and unique. 


This peacock bracelet has a velvet ribbon band with twill tape added for stability.  I got the idea from Bev at Flamingo Toes .  She has awesome tutorial with great ideas.  I thought this would be a great gift.  I am going to make myself one after Christmas and I am toying with the idea of using an old pin that was my grandmother's as the centerpiece.  I love that pin and hold it so dear because I remember my mom giving it to me and telling me how much it meant to her mother.  I guess I am afraid of something happening to it.  It isn't really serving any purpose shut away in a jewelry box so I may just go ahead and use it.  It would make the piece I am planning that much more special.  I will include a picture when I complete it.


I also wanted to share a beverage that is so good and crazy simple to make.  It is a hot pumpkin spice steamer  that I saw on Crafty Chelsea.  I had to whip one up when I read about it and I was hooked!  I happened to have the little individual pumpkin spice creamers so I can tell you(if you are interested) that it takes six of these little devils to make one cup of this stuff.  After I used all my little creamers, I went ahead and purchased the full-size creamer.  I am sure I will manage to use it all! 


   Lastly, I wanted to show you a project that went in a different direction than it began.  I mentioned in an earlier post that I was excited to be learning a new jewelry technique in my bead of the month club.  Well, I became very frustrated using the silk thread to bead, especially knotting the beads in place.  I ended up using silver chain I had and making up my own pattern.  I was happy with the result but a little disappointed that I gave up.  I have another kit that involves that same silk thread technique, so I think  I will give it another go.  This time I will try to be more patient. 

I have been doing a lot of knitting lately and will share a project I made for my son's girlfriend next time.  As it gets colder here, I am really enjoying working with yarn as I watch television in the evening.  I also have been a pinning fool with my new love of Pinterest.  Nobody warned me how addictive it is!  I hope you all have a wonderful Thanksgiving.  Take care.  Nancy

Sunday, November 10, 2013

Awesome Bracelets and a Yummy Recipe Accident

Hi everyone and happy Sunday!  It most definitely is a happy Sunday in my opinion because it is a Sunday of a three day weekend!  I have been busy and I am dying to share a project I completed yesterday. 

I don't know if you are familiar with those trendy bracelets that are half chain, half braided cord.  I have been seeing them everywhere so I decided to recreate my own version. 


I started out with the materials I show in the picture.  I bought the silver chain and the white cording at Walmart and the endcaps, lobster clasps and the silver and black cording at Michaels.  I don't live in a big city so the endcaps were not the easiest to find.  JoAnn had them online but not in our local store.  They come in different sizes so purchase them according to the size of the cording you are using. 


I measured out my chain.  I used 3 1/2 inches but you could change that based on your wrist size and how much chain you want to show.  Next, I measured out the cording to 3 1/4 inches and wrapped a very slim piece of tape around it so I could cut it and it wouldn't unravel.  I repeated that so I would have 2 pieces of cording cut to size.  I glued the ends in an endcap with E6000 glue.  I had to replace the jump ring that came with the endcaps to a large one because the chain I picked was too big for the little one.  I connected the cording to the chain with the large jump ring and attached the toggle clasps to either end.  I had so much fun with this bracelet, I looked through my stash and came up with two other different ones. 


As you can see by the picture of the different bracelets, you can mix it up by switching out the chain sizes and styles, colors and diameters of cording and the way the bracelet clasps.  I had the small piece of decorative chain left that you see on the black bracelet and I was thrilled I could use it.  It is a great way to use up snippets of chain.  I think these would make great gifts, especially if you chose to make a bracelet like I made the black one.  The lobster clasp and dangling small chain make it adjustable.  Have fun with this if you decide to make one.  It really was easy. 

I also want to share a happy recipe accident with you. 


What you see here is a plate of peanutty goodness that tastes just like a Payday candy bar.  It was supposed to be, according to the recipe, peanut brittle.  The texture was solid enough to come off the buttered cookie sheet intact and be cut into squares, but it was chewy and gooey-just delicious.  Here is the recipe and you will end up with brittle or what I ended up with-either way, it's a win!
Line a cookie sheet with foil and butter it.  In a heavy bottomed saucepan, combine 1/4 cup butter, 1/4 cup sugar, 1/4 cup honey, 1/4 cup heavy cream and 1/2 teaspoon course salt.  Heat over medium low heat until mixture comes to a boil, stirring the whole time.  Boil over medium heat 4-5 minutes, until it turns a dark amber color.  Adjust heat to maintain a steady boil but not to scorch or boil over.  Stir in 1 1/2 cups dry-roasted peanuts.  Immediately pour onto prepared baking sheet and allow to cool for about an hour.  Break into pieces.   Mine never turned amber in color but I didn't want to go beyond the 5 minutes.  Now I know most of you would say that a candy thermometer would be a wise choice for a brittle recipe and you would probably be right.  I am not sure why I resist using one of those, except to say my Mom never used one and used to tell me they were too complicated when I was young and showed her a candy recipe I wanted to make that required one.  Now I am on a quest so I will get the candy thermometer out from the cupboard(I think I got it as a gift) and give a real brittle recipe a try.  But in the meantime, this recipe turned out delicious and I hope lightning strikes twice and it will turn out the same next time.  It was a happy recipe accident! 

I hope you all have a great week ahead.  I finally broke down and signed up for a Pinterest account.  I don't know why I waited so long(maybe it is like the candy thermometer!).  I will probably be experimenting with "pinning" a lot this coming week.  If you have any tips, feel free to email me.  I am new to it.  Take care.  Nancy

Sunday, November 3, 2013

Keeping My Tootsies Warm

Hi and happy Sunday evening!  I have been trying to hold off yet another sinus infection with little success.  It is getting colder here in the Northeast so let the colds/flu/sinus infections begin! 

Speaking of cold, I decided to stitch up something to keep my feet nice and toasty.


I got the pattern from the second One Yard Wonders book.  These are made of fleece and were really easy to whip up.  I know I played it safe with a solid color when there are so many awesome fleece prints out there, but I was trying to match a blue plaid fleece robe I have.  The more I look at them, they remind me of Cookie Monster!  Anyway, they really do keep my feet warm.  They are lined so it is a double layer of fleece.  I thought these would be spectacular for a Sunday spa day this Winter if I heat them in the dryer and slather on lotion before I put the warm booties on.  Sounds heavenly doesn't it?  They go all the way up to my knees so I could tuck in sweats or pajamas.  Between these and my fireplace, I am set for the snow to fly! 


I wanted to share a great recipe with you.  This versatile cake is perfect to bring along for so may occasions.  It is great for breakfast or dessert and, because of the oats, there is some nutritional value-at least that is what I tell myself about anything with oats!  This is a butterscotch oatmeal cake. 
Pour 1 3/4 cup boiling water over 1 cup quick-cooking oats in a large bowl.  Let that stand for 10 minutes while you prepare a 13x9 baking dish by greasing it.  Preheat your oven to 350 degrees.  Add 1 cup sugar, 1 cup brown sugar, and 1/2 cup softened butter to oats.  Stir in 2 eggs until everything looks combined.  Stir in 1 3/4 cup flour, 1 teaspoon baking soda, and 1/2 teaspoon of salt.  Stir it all together.  Add 1 cup butterscotch chips.  Combine and pour batter in the prepared pan.  Smooth it out and sprinkle 3/4 cup chopped pecans and what is left of a full bag of the butterscotch chips(after you put a cup in the batter)over the cake batter in the pan.  Bake about 40 minutes until a toothpick comes out clean.  It makes your whole house smell good and I liked it very much warm.  Enjoy! 

I hope you all have a great week ahead.  I am in the process of knitting my son's girlfriend a scarf for Christmas.  I am using a pattern I saw on the new season of Knit and Crochet Now.  It is a fun pattern and coming along nicely.  I also am at a step in my jewelry making where I am learning a new technique.  I will be using 100% real silk thread to bead with and will learn how to knot it so it looks neat and uniform.  I am looking forward to that.  Take care.  Nancy  

Sunday, October 27, 2013

A Knitted Wrap and A Brown Jewelry Set

Hi everyone and happy Sunday.  I have been so excited to share an easy knitted wrap I made in record time. 


I used size 17 knitting needles and Vanna's choice yarn in woods print.  It took 2 1/2 skeins.  I cast on 36 stitches and knit every row.  I love projects like this because I can knit while watching tv.  It has no difficult sequences to remember.  I have been watching scary movies every evening with my husband leading up to Halloween so a project like this is perfect!  I went to my local Kohl's and purchased a long sleeved tshirt in black and I was all set.  I thought this would make a great gift too. 


 I also wanted to show you a jewelry set I made.  I found the brown shell-like beads in my local craft store and decided to pair them with little white cube beads and light and dark brown crystal beads.  I wear a lot of brown so I considered keeping this set but I think I will give it away as a gift or sell it.  I just don't have room to keep all of my creations! 

I hope you all have a happy Halloween and a great week ahead.  Take care.  Nancy

Sunday, October 13, 2013

A Puzzle Bag for a New Big Sister, Fall Donuts and Pearls

Hi everyone and happy Sunday.  I am pretty happy I have tomorrow off.  I have a new crochet project I have been itching to start and I think I will start it tomorrow-that is if I don't start my sewing project I have been meaning to do for a while! 


I made an I Spy puzzle bag for the big sister of the baby I made the safari hat rack for.  I have made quite a few of these.  They are such fun to think up personalized things to put in.  I got the instructions from Brittany's Best and the steps are easy to follow and they are fairly quick to make.  They only look difficult because of the vinyl window but that makes them all the more impressive to give as a gift.  I embroidered her name on a tag on the back but guess what-I forgot to give her the list of what is in the bag.  I promised her mom I would email the list to her so she will know what she is looking for. 


We made some delicious baked apple cider donuts .  They turned out so good and they are reasonably healthy because they are baked and not fried in oil.  Nothing says Fall like apple cider donuts.  I am especially fond of the nutmeg in the frosting.  Yum! 


Lastly, I wanted to share one of my favorite jewelry projects so far.  I am a pearl girl for sure.  I love the classic elegance of pearls and I love that they look good with denim too-not just dressy clothes.  After making the colorful bracelet and earrings last week, I applied the same idea to these beautiful teardrop pearls.  I was very pleased with the end product.  I have kept these for myself and have already worn them. 

I hope everyone has a great week ahead.  I am hoping to get a lot of crafty things done so I can move on to even more crafty things!  Take care.  Nancy 

Sunday, October 6, 2013

Halloween's Coming-I Want to be Ready!

Hi everyone and happy Sunday.  It is rainy and a bit cooler here today.  I had a very nice birthday last week and a nice little getaway with the hubs.  Now it is back to reality! 


I painted these swell candy corn shoes for all my school Halloween festivities.  I am more into Halloween than some kids!  I have several Halloween shirts and jewelry just for the spooky season.  Now I have shoes too!  I got the idea from Allison at Dream a little Bigger .  I have mentioned before how awesome she is and her blog has so many clever ideas.  I thought these shoes were so cute, I just had to paint them.  In her blog, Allison gives the idea to get a pair of white shoes like these off of ebay for ten bucks postage included.  That is what I did.  I bought the fabric paints at my local Michaels and I was especially thrilled that the yellow paint had a bit of the glitz with glitter in it.  I thought that was particularly appropriate for Halloween.  They were easy and I can't wait to wear them.  I am ready! 

I also wanted to share the birthday cake my husband made me.  It is a raspberry cake and it was delicious!  He did a great job.  Just take a box of white cake mix, a box of raspberry Jello, 4 eggs,  1/2 cup of canola oil, and 1/4 cup of hot water and beat it for 2 minutes.  Add a 10 oz. package of sweetened frozen raspberries(thawed) and fold in.  Pour into a greased 13x9 pan and bake at 350 for 35-40 minutes.  Cool completely and frost with a thawed 12 oz. Cool Whip mixed with another package of raspberries(10oz. sweetened thawed).  That frosting is to die for!  With the addition of vanilla ice cream-it was a birthday cake after all-it was a fantastic dessert.  My hunny is the cat's meow! 

Last, but not least, I wanted to share my latest jewelry project.  I thought this bracelet and earrings set turned out pretty colorful.  I had these long oval beads that were almost cat's eye in appearance so I paired them with similar colored seed beads and made dangles which I added to a chain for a bracelet.  I counted links so they would be visually balanced .  I then made a pair of matching earrings.  I thought these would even be something a teen would like.  I am dragging my heels trying to figure out how I should begin to try to start selling my jewelry.  I am open to any suggestions.  I have been having so much fun making things, I need to do something with a lot of the excess I have! 

I hope everyone has a great week ahead.  I have a lot of projects I want to do.  I just have to get hopping!    Take care.   Nancy

Saturday, September 28, 2013

A Gift for a Special Baby, Some Yummy Cupcakes and Earrings

Hi and happy Saturday evening.  I am posting a little earlier this week so that I can have more crafting time tomorrow.  I wanted to start out with a project I am very proud of. 

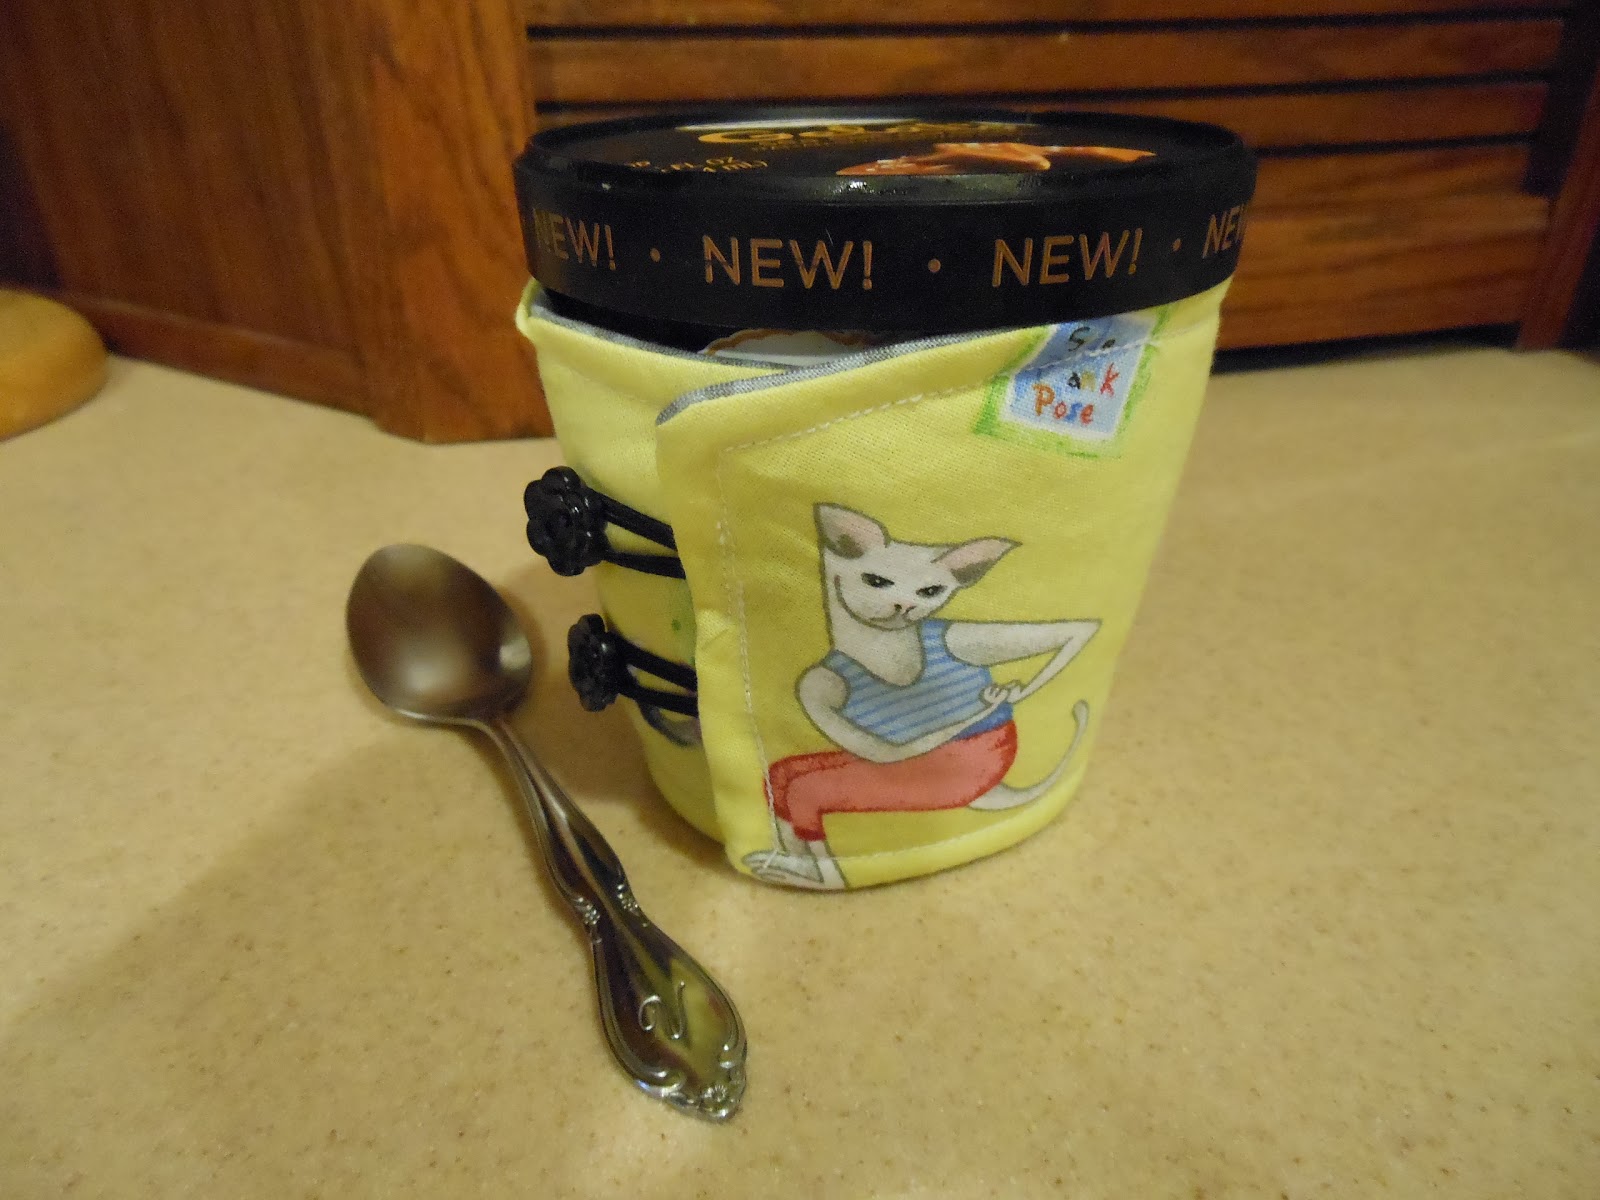
A good friend had a new baby, a boy named Gunner.  I can't wait to get over and see him in person.  He looks so cute in the pictures I have seen of him.  I decided to make this African animal cap holder.  I thought it was a great gift for a second baby, her first boy.  Even if it doesn't go with the theme of the room, it would be useful on the back of the baby's room door.  If hung low enough, he could hang things on it himself when he gets older.  I used this tutorial  which led me to the original Martha Stewart tutorial.  I got useful information from Katie at Made To Be A Momma.  I went with her suggestion to use freezer paper as a stencil because she and I share the same crafting philosophy-keep it as uncomplicated as possible and use what you have. 


The toughest part of this project was getting the right size hooks.  We had to return some and go to another store to get the right size.  I am pleased with the results and as soon as I am 100% over my cold, I will pop over and see the happy and no doubt, slightly tired family and see little Gunner in person.  I want to whip up a puzzle bag for the big sister so she won't feel left out. 

I also wanted to share a pretty sweet recipe for Apple cupcakes.  I have this adorable little girl in my class this year who brings me an apple several days a week.  She is just such a doll and so thoughtful!  Anyway, I am coming up with ways to use the apples and this recipe used a couple of them. 

 Preheat your oven to 375 degrees.  Put foil or paper muffin cups in a 12 cup muffin tin.  Spray them with baking spray so your cupcakes won't stick. 
Peel and chop a couple of decent sized apples and put them in a small bowl.  Sprinkle with 3/4 teaspoon of cinnamon and a healthy dose of freshly grated nutmeg.  Set aside.
In a medium bowl, put 1 cup Bisquick, 2/3 cup sugar, 2/3 cup milk, 4 Tablespoons melted butter and 2 eggs.  Stir together with a whisk.
Put 1 heaping tablespoon of batter in the bottom of each liner.  Divide the apples evenly among the liners on top of the batter.  Put another heaping tablespoon batter on top of the apples.  Bake for 15-20 minutes until they are golden.  Cool for 5 minutes and remove the muffins from the tins to a cooling rack.   Serve them with sweetened whipped cream and drizzled caramel sauce.  Enjoy!


Here are some earrings I made.  They are similar to some other ones I have made.  I loved the iridescent clear beads.  I love making earrings because they are so quick and easy and don't require many materials.  Also, with my hairstyle, they are something that gets noticed right away. 

I hope you all have a great week ahead.  I have a doctor's appointment in a town about an hour away and after that, my husband and I are going to spend the night at a resort for a little getaway.  It is my birthday Wednesday so I am excited for a three day work week and a four day weekend.  Take care.  Nancy

Sunday, September 22, 2013

A Wonderful Weekend

Hi and happy Sunday.  I have enjoyed this weekend very much.  I am feeling quite a bit better compared to last weekend and I have gotten a lot accomplished.  I have been working on a project for a friend's new baby and that has been fun.  I will post about that next weekend when it is completed and gifted. 

 Starting out with a bang, I want to show you some saddle shoes made from $6 Walmart white sneakers.  I used info from Allison at Dream a little bigger .  I have gotten so much information and inspiration from her blog.  She is a genius with shoes!  All this project took(besides the shoes) was a fabric marker.  One pair took almost all of the ink in one marker, but it was so worth it.  I had saddle shoes as a teenager so I was excited to get a pair now at a reasonable price.  They look cute with jean capris.  I imagine you could use any color marker to get whatever color saddle shoes you want. 


I also took advantage of the cooler weather this weekend to make some yummy cookies.  Nothing says Fall like pumpkin to me so I saw a recipe for pumpkin chocolate chip cookies with only three ingredients so I had to try them.  I, of course, substituted white chocolate chips for the chocolate ones and they were so moist and delicious and most of all:easy!  How can you go wrong with three ingredients?  I suppose you could put raisins or some other add-in in these cookies.  I am assuming they have to be somewhat healthier than other recipes for cookies because there is no butter, shortening or egg in them.  You have to try them.  Be warned though, they go quick!     
 
My latest jewelry project is from my club kit.   I love the color of the green beads.  It wasn't too difficult or time consuming and I think I will be keeping this set.  I think I may need a second jewelry armoire for all the jewelry I am making!  I have a couple of friends who I will be making jewelry for as part of their Christmas gifts so I will probably be starting soon on those.  I have quite the list of holiday gift projects.  I promised myself that I would get an early start so I am not frenzied in mid December. 
 
Well, I hope you all have a great week ahead.  My husband's birthday is tomorrow so the family will be going out for dinner.  I will make his carrot cake with cream cheese frosting when I get home from work tomorrow so we can have that when we come home.  Take care.     Nancy 

Sunday, September 15, 2013

An Exceptional Macaroni Salad and More Jewelry

Hi and happy Sunday-not so happy for me because I have my first sinus infection of the season.  I think this has to be a record for me, two weeks into school.  Anyhow, I tried to rest this weekend and we will see how tomorrow goes.  I am trying desperately not to be on as many antibiotics this year but it is not looking good. 

I wanted to start off  with a delicious ranch chicken macaroni salad.  It quickly became a family favorite and I have made it twice since I discovered the recipe.  Cook about a cup of dry macaroni in boiling salted water until tender and drain and rinse.  Make sure you rinse it good because there is plenty of salt in the packet of ranch you will be adding.  In a large bowl mix together: a stalk of chopped celery, several spoonfuls of green olives, chopped, 1/4 cup each mayo and sour cream, a couple of tablespoons milk, a packet of dry ranch dressing mix, and some chopped rotisserie chicken breast(1 breast).   Add the macaroni and mix well.    Refrigerate to marry the flavors and sprinkle with smoked paprika.  It is delicious and different with all the ranch spices.  Plus the green olives made it a winner for me.  Enjoy! 

Here is a bracelet I made while experimenting with some assorted green beads and some metal beads with words on them.  I used jewelry wire to string the bracelet and I loved how some of the beads had some of the copper glitter in them to match the "live" bead.  I also happened to have a matching clasp so I was pretty happy with the result. 

I hope you have a great week ahead.  I am going to try to get in my craft room and get some sewing done.  I have some fun projects I want to make.  Take care.  Nancy

Sunday, September 8, 2013

A Giveaway and a Look See at What I Have Been Up To


Hi all!  Happy Sunday to everyone.  I have been having a pretty great weekend.  Now that school is back in session I am appreciating my Saturdays and Sundays again like they were made of gold!  Because I appreciate all of you that read my blog and make comments, I want to throw an earring giveaway.  You will have your choice of the above pictured earrings:  The red white and blue pair, the silver and black pair, or the blue and green crystal pair.  All you have to do is be or become a follower to my blog and leave me a comment.  I will chose a winner next weekend and let you know  by email and on my blog post next Sunday. 

On the jewelry front, I made this set for myself.  I fell in love with the red flowered beads I found in the craft store.  They reminded me of bandannas, which I love, so I had to do something with them.  I used the black metal findings and some jet black glass beads along with some yellow gold crystal beads to accent them.  I even made a watchband for my interchangeable watch I have.  I thought the set would look good with a plain black or gold shirt or sweater this Fall. 

I also made this cube shaped small wristlet for a recent trip to a casino.  I don't like to carry my purse when we go there, so I usually use a wristlet, a fanny pack or a cross the body small purse.  For this cute little cube, I used a tutorial from Sew Spoiled.  I just added the wrist strap myself.  The instructions were well written and easy to follow.  I used recycled denim from a pair of jeans my youngest son had worn to the point of "unmendable".  For the lining, I used a pretty rose print.  It worked out well, I just had to pick and choose what was important to take because it is rather tiny!  It didn't weigh me down or feel clunky so that was nice.  I have more plans for those jeans, I just have to get at them. 

Last week was beautiful here in Northern NY-cool but not cold with warm afternoons.  This week promises to be very warm again.  I like the Fall weather so I will be anxiously awaiting its return.  Have a wonderful week and take care.  Nancy

Sunday, September 1, 2013

Back To School and A Seaside Theme

Hi everyone.  Well, here we are at the beginning of a new school year.  I can't believe how fast August went.  I have really enjoyed my vacation.  It wasn't as structured as it could have been but I got some rest and relaxation in. 


I wanted to show you what I call my Mermaid set.  It all began when I got some sandals from Avon years ago with starfish on them.  I loved them so I was excited when I found a silver cuff starfish bracelet at a gift shop last summer.  Then Avon had a silver starfish cuff watch for sale this past Spring.  I had to complete my starfish jewelry/sandals with a necklace and earrings so this is what I came up with.  I love the blue square glass beads and pearls together and I was fortunate to find a chunky silver starfish pendant that was fairly plain.  I love it and I can't wait to find the perfect place to wear it and the perfect outfit to wear it with! 

Continuing with my beachy theme, I wanted to share an amazing dinner I made recently. 


This was yet another Pioneer Woman recipe Penne Alla Betsy .  It has shrimp and heavy cream in a tomato-based sauce.  I used the white wine suggested in the recipe but you don't have to.  We served it with a tossed salad and Italian bread and it was delicious.  There were plenty of leftovers and my husband and son said it was just as good the next day.  My husband and I go to Red Lobster for date night a lot and we both felt this tasted like an entree you would get there.   I hope you try it.  If you like shrimp, you won't be disappointed. 

Well, I am looking ahead to a busy week.  I met many of my students at an open house last week and they are so cute and fun.  It should be a good year.  I am thinking of having a giveaway next week of a pair of earrings I made.   I hope the first week of school craziness is gone by then! Take care.  Nancy

Sunday, August 25, 2013

A Watch and A New Friend

Hi everyone and happy Sunday.  I have been trying to get every last minute of freedom into my crafting before school starts.  I have been a jewelry making fool for sure!  I ordered a watch face in gold, not realizing it wasn't for interchangeable watchbands, like my silver one, but a one-time stretchy band.  This is what I came up with:

I had bought a string of hammered-looking multi metal discs and put them with my stash-not sure what they would become.  This worked out great.  It is a comfortable watch with some versatility, thanks to the multiple finishes of metal in it.  I may buy some more of those faces and make some as gifts. 

I also made some earrings that were really quick and easy.

I love the variegated blues in these teardrop beads.  That whole ombre look is really hot right now.  These look especially cute with white or denim. 

Now I have a confession to make.  I never understood anyone eating ice cream right out of the container.  I thought it had to be a thing that only occurred when someone's heart was broken or they lost their job or something.  To be fair, I have never been a huge fan of ice cream.  I have always had a "take it or leave it" approach to it.  Well, all that has changed.  Say hello to a new friend of mine. 

I don't know if it is a good thing or not but this gelato is becoming a VERY good friend!  The best gelato I had ever had was at Epcot down in Disney World.  I would make my family arrange their whole day around the opening time of the gelato cart in the around the world part of Epcot!  There is something about the texture and intensity of the vanilla and other flavors.  Anyway, now I can get it right in my local grocery store.  Do you see where this is going?  That is right-I hide it in the freezer and eat it right out of the carton.  This led to some cold fingers.  So what should you do for a new best friend?  I thought it was appropriate to make a cute cozy for my new friend.  I even made it reversible. 


I love that yoga cat fabric!  I looked up ice cream pint tutorials and found several.  I kind of read them over and went off on my own.  I discovered, much to my frustration, that I couldn't seem to roll the pint out on paper to make a pattern.  I washed out a used container and cut it apart and made my pattern that way-so easy.  Now I can eat my gelato in comfort and nobody can see what I am eating.  If they could, it would lead to awkward questions: what is that? I didn't know they had that. Can I have some?  For the record I usually share well with others, just not with this!  By the way, the salted caramel is to die for! 

I hope everyone has a great week ahead.  Take care.  Nancy

Sunday, August 18, 2013

Anchors Away!

Good morning and happy Sunday.  I have been busy this week and I have lots to share.  I will kick it off with two really cute and really easy nautically themed bracelets. 

I bought the silver anchor charm at my local craft store.  I also bought some suede cording and just "knotted" lengths of the cording at each end.  It took me a while to figure out the correct length for me; there were several cuts-even after I had glued on the metal ends!  I used E6000 glue to reinforce those crimped ends, by the way.  That stuff is amazing.  I then attached the clasp and jump ring.  That was the silver bracelet.  It then occurred to me that I have a pair of gold and navy earrings with anchors on them so(you guessed it) the matchy-matchy in me insisted I make a gold one.  So I got the gold anchor off of Ebay and the gold crimps off of Etsy.  These are so cute, easy and inexpensive.  I have seen other metal charms used as well.  I think they would make great gifts. 

I also continued on my quest to leave no pair of glasses(sun or otherwise) naked and uncozied!  I saw this case at Clippie Dips and I just had to make one. 

I lined it with minky so my glasses would be cushioned.  I used felt for the banners to match the chevron print.  Pretty cute and very easy to make.  I love useful little projects don't you? 

Lastly I wanted to share a good dessert that is a go-to for me. 

It is a mixed fruit cobbler made with frozen fruit.  I have used canned fruit too.  That is one reason I love this recipe-it is pretty versatile.  Turn your oven to 350degrees and put half a stick of butter in a 9" square pan.  Pop the pan in the oven to melt the butter while you prepare the rest.   In a bowl, combine 3/4 cup self-rising flour, 1/2 cup sugar, 1/2 cup milk, and 1/4 teaspoon extract(vanilla or almond).  Stir until smooth and pour over the melted butter in the pan.  Here is where you can come up with limitless variations: either pour a 16oz can of fruit with the juice or thawed(in the microwave) frozen berries over the batter.  You can slightly sweeten the frozen berries if you choose.  Bake for 45-55 minutes until the cake looks golden.  Serve with whipped cream or ice cream while warm.  This is a favorite year round but I especially like it in the cooler months.  Enjoy! 

I have to go to a meeting Tuesday morning which will kick off my "going back to school pre-work workdays".  I am trying not to complain because many people at my husband's workplace lost their jobs recently in a huge financial cut-back so I do feel lucky to still have a job. I hope you all have a great week ahead.  Take care.  Nancy 

Monday, August 12, 2013

Cool Shoe Remake, An Easy Yummy Dessert, and A Beautiful Jewelry Set

Hi everyone.  My Summer vacation clock is ticking down.  I have so many fun projects I intended to do this Summer, I think I became overwhelmed and that caused me to not get to a lot of them.  That is my story and I am sticking to it! 

One thing I want to share is a really fun shoe makeover. 


The idea came from I Spy DIY .  I purchased the shoes from Payless on sale.  I then went to JoAnn Fabric and found some inexpensive grosgrain ribbon to match the shoes.  I also purchased some antique gold chain.  I had the glue and jewelry findings I needed.  It was super quick and I love the results.  These will look cute with a skirt or capris. 

On the food front, this dessert I came up with was WONDERFUL! 

I made a trifle with purchased Angel Food cake, a couple of cans of cherry pie filling, and a creamy layer made with a big container of thawed Cool Whip, a can of condensed milk and 1/4 cup of lemon juice mixed together.  Layer it and there you have it.  How easy and very elegant looking-good enough for company!  There is something about a trifle that is so classy. 

My latest jewelry club kit turned out very nice. 

As usual, I came up with the bracelet myself.  The kit was for the necklace and earrings, but I had to make a matching bracelet.  It was fun to work with extras from the kit and luckily, I had a heart toggle clasp in the right metal finish.  It goes quite well I think.  The necklace looks really nice on.  The colors are perfect for Fall. 

I hope you all have a great week ahead.  Take care.  Nancy